Class 6 Mathematics • Ganita Prakash • Chapter 2
Lines and Angles Class 6 Worksheet
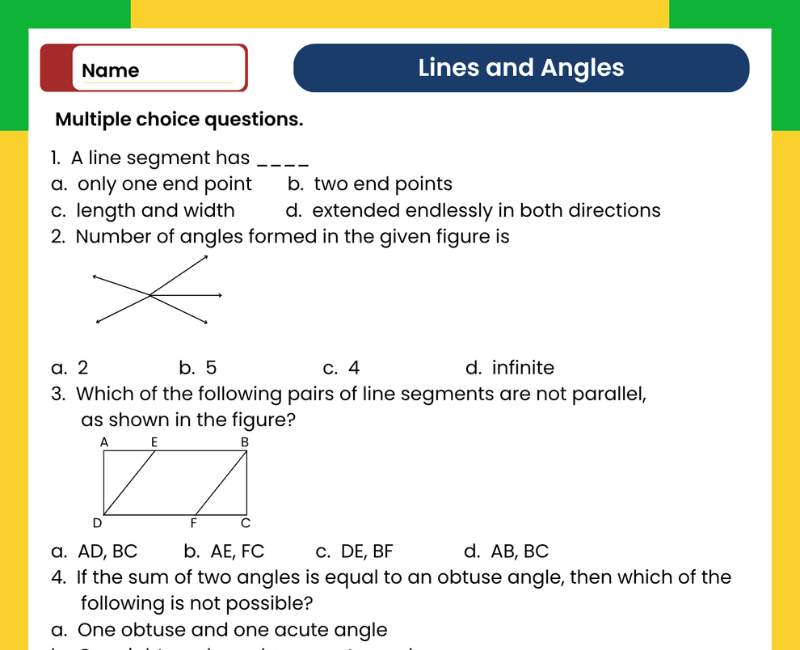
Practise the foundations of geometry with the Lines and Angles Class 6 worksheet with answers from WitKnowLearn. Use this resource alongside Chapter 2 of the NCERT Ganita Prakash textbook to revise geometric vocabulary, recognise angles and develop careful drawing and measurement habits.
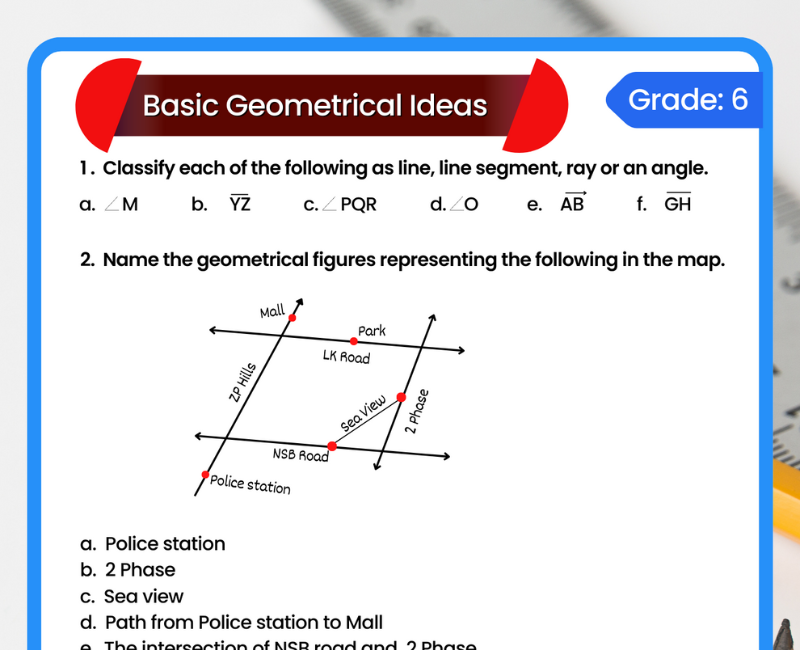
Begin by observing the diagram and identifying its points, endpoints and arrow marks. Then decide whether the question asks you to name, classify, measure or draw a geometric figure. Clear labels and correct use of a ruler or protractor make your working easier to understand.
Points, Lines, Line Segments and Rays
Geometry begins with a few basic ideas. A point indicates a position and is usually labelled with a capital letter. Lines, line segments and rays differ in how far they extend and how many endpoints they have.
- Point: indicates an exact position.
- Line segment: has two endpoints and a measurable length.
- Ray: has one endpoint and extends endlessly in one direction.
- Line: extends endlessly in both directions.
A drawing shows only part of an endless line or ray. Arrow marks indicate the directions in which it continues. Look at these marks rather than judging the figure only by the length drawn on the page.
What Is an Angle?
An angle is formed by two rays with a common endpoint. The common endpoint is called the vertex, and the two rays are called the arms of the angle.
Example: ∠ABC
The vertex is B.
The arms are the rays BA and BC.
When naming an angle with three letters, write the vertex in the middle. This helps identify the correct angle, especially when several rays meet at the same point.
Types of Angles for Class 6 Revision
Angles are measured in degrees, written using the symbol °. Compare the opening between the arms with a right angle or a straight angle to estimate the angle type before measuring.
- Acute angle: greater than 0° and less than 90°.
- Right angle: exactly 90°.
- Obtuse angle: greater than 90° and less than 180°.
- Straight angle: exactly 180°.
- Reflex angle: greater than 180° and less than 360°.
- Complete angle: exactly 360°.
For example, 40° is acute, 90° is right and 125° is obtuse. An angle of 180° is straight, so it should not be included in the obtuse category.
Angle Size Depends on the Opening
The size of an angle depends on the amount of turn between its arms. It does not depend on how long the arms are drawn. Extending the arms without changing their directions leaves the angle unchanged.
Remember: longer drawn arms do not automatically mean a larger angle.
Compare the opening near the vertex. Turning the entire diagram on the page also does not change the angle measure. A right angle remains 90° even when it is drawn in a different orientation.
How to Measure an Angle with a Protractor
A protractor helps measure angles accurately. Correct positioning is essential: placing the centre away from the vertex can produce an incorrect reading.
- Place the protractor's centre mark on the vertex.
- Align its baseline with one arm of the angle.
- Choose the scale that begins at 0° on that arm.
- Read where the other arm crosses the scale.
- Write the measurement with the degree symbol.
Estimate the angle type before reading the scale. If the angle looks acute but your reading is greater than 90°, check whether you have used the wrong scale.
Drawing an Angle of a Given Measure
Drawing an angle combines careful marking with accurate use of the protractor. Keep the vertex fixed while locating the required measurement.
Example: draw a 60° angle
- Draw a ray and label its endpoint O.
- Place the protractor's centre at O.
- Align the baseline with the ray.
- Mark 60° using the scale that starts at 0° on the ray.
- Draw a second ray from O through the marked point.
Label the angle and check its measure after drawing. These steps are additional revision guidance for use alongside the worksheet.
Common Mistakes to Avoid
- Confusing a line with a line segment: check endpoints and arrow marks.
- Misplacing the vertex when naming an angle: keep the vertex letter in the middle.
- Reading the wrong protractor scale: start from 0° on the aligned arm.
- Judging angle size by arm length: compare the opening between the arms.
- Forgetting the degree symbol: write 60° rather than only 60 when giving an angle measure.
How to Use the Worksheet with Answers
Open the worksheet preview and use the download option on this page, following its access instructions. Keep a pencil, ruler and protractor ready for questions that require drawing or measurement.
Attempt the questions before checking the provided answers. For a measurement error, review the protractor's position and the scale used. For a naming error, identify the vertex and arms again.
Teachers can use selected questions for classroom practice or revision. Parents can ask students to explain why an angle is acute, right or obtuse. Encourage clear reasoning and neat labels alongside the final answer.
Explore All Other Class 6 Ganita Prakash Worksheets
Continue your chapter-wise revision with these Class 6 Maths worksheets from WitKnowLearn. Select a box to open the related worksheet page.
→ Chapter 1: Patterns in MathematicsExplore number sequences, shape patterns and the rules that connect them. → Chapter 3: Number Play
Explore number arrangements, digit patterns and mathematical reasoning. → Chapter 4: Data Handling and Presentation
Practise organising information and interpreting pictographs and bar graphs. → Chapter 5: Prime Time
Revise factors, multiples, prime numbers and prime factorisation. → Chapter 6: Perimeter and Area
Practise boundary lengths and the areas of squares and rectangles. → Chapter 7: Fractions
Practise representing, comparing and working with fractions. → Chapter 8: Playing with Constructions
Explore geometric drawing using a ruler and compass. → Chapter 9: Symmetry
Investigate lines of symmetry and rotational symmetry in figures. → Chapter 10: The Other Side of Zero
Explore positive and negative numbers through number lines and everyday situations.
Frequently Asked Questions
What is the difference between a line, ray and line segment?
A line extends endlessly in both directions. A ray has one endpoint and extends endlessly in one direction. A line segment has two endpoints.
What are the vertex and arms of an angle?
The vertex is the common endpoint of the two rays forming an angle. The rays are its arms.
Which letter is the vertex in ∠ABC?
B is the vertex. When an angle is named with three letters, the vertex is written in the middle.
What is the difference between acute and obtuse angles?
An acute angle is greater than 0° and less than 90°. An obtuse angle is greater than 90° and less than 180°.
Does increasing the length of an angle's arms change its size?
No. Extending the arms without changing their directions leaves the angle unchanged. Its measure depends on the opening.
How do I choose the correct protractor scale?
Use the scale that starts at 0° on the arm aligned with the protractor's baseline. Check that the reading matches the angle type.
What is a reflex angle?
A reflex angle measures more than 180° and less than 360°.
How should students use the worksheet answers?
Attempt the questions first, then check the answers. Review labels, angle classification and protractor positioning before correcting mistakes.
 Download